
Everything You Need to Know to Receive Payments on Stripe
What is Stripe?
At Native Spaces, we use Stripe to manage all payments. It is one of the world’s largest and most reliable payment systems. Companies like Amazon, Google, and millions of others use it every day.
Why do we use it?
🛡️ Safe & Secure: Your bank details are protected. We never see or store them. Stripe keeps everything private and secure.
⌛ Fast Payments: It ensures you get paid quickly when you rent out your venue.
🤝🏼 Trusted Worldwide: Millions of people and businesses use Stripe. It’s reliable and well-known.
What Information Will Stripe Ask You For?
If You Are an Individual:
- Your full name
- Your email address
- Your bank account details (IBAN or account number)
- Proof of identity (like an ID or passport) – sometimes needed for security
If You Are a Company:
- Company name
- Company registration number (like SIRET, VAT, etc.)
- Company address
- A representative’s name and proof of identity (this is usually a director or owner)
- Company’s bank account details (IBAN or account number)
Why do we ask for your banking details?
So Stripe can send your earnings directly to your bank account—safely and automatically. Simple as that. Your information is always safe, and you stay in control.
Whether you’re a freelancer, a business, or an event organizer, creating a Stripe account lets you easily accept card payments.
What happens if you have missing information and someone sends you a payment?
If your payment details are incomplete, here’s what happens:
🚫 Your money won’t reach your bank account.
Stripe will hold your payment until you finish setting up your account.
Even if someone sends you a payment, you won’t be able to access it until you provide the missing details (like your ID or bank info).
In this guide, we will walk you through how to set up your Stripe account step by step and how to access it to track your transactions.
Setting Up Your Stripe Account: Step-by-Step Guide
How to create a Stripe account?
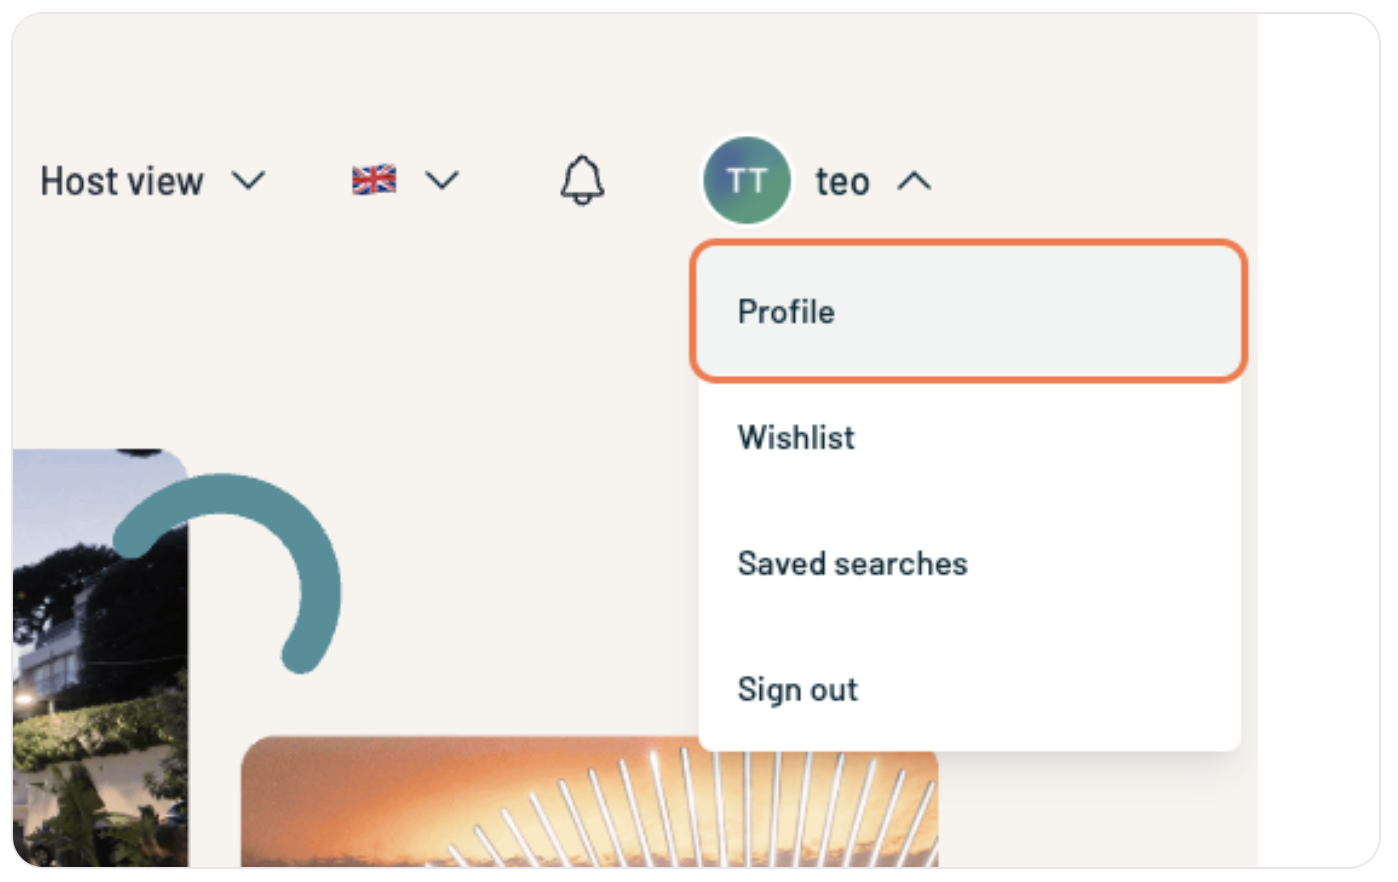
- Access Settings
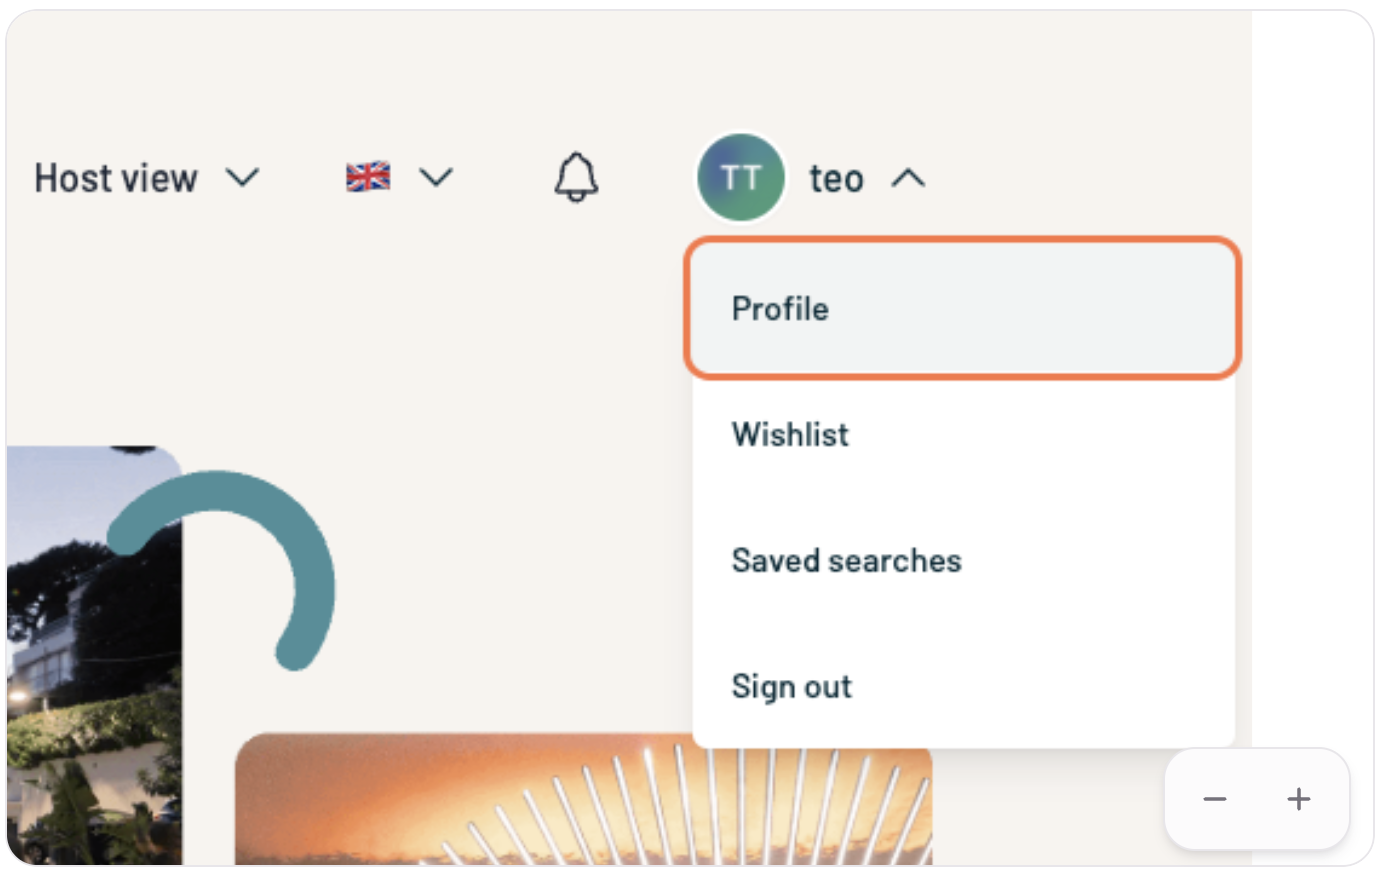
- Click on your profile icon.
- Select Profile.
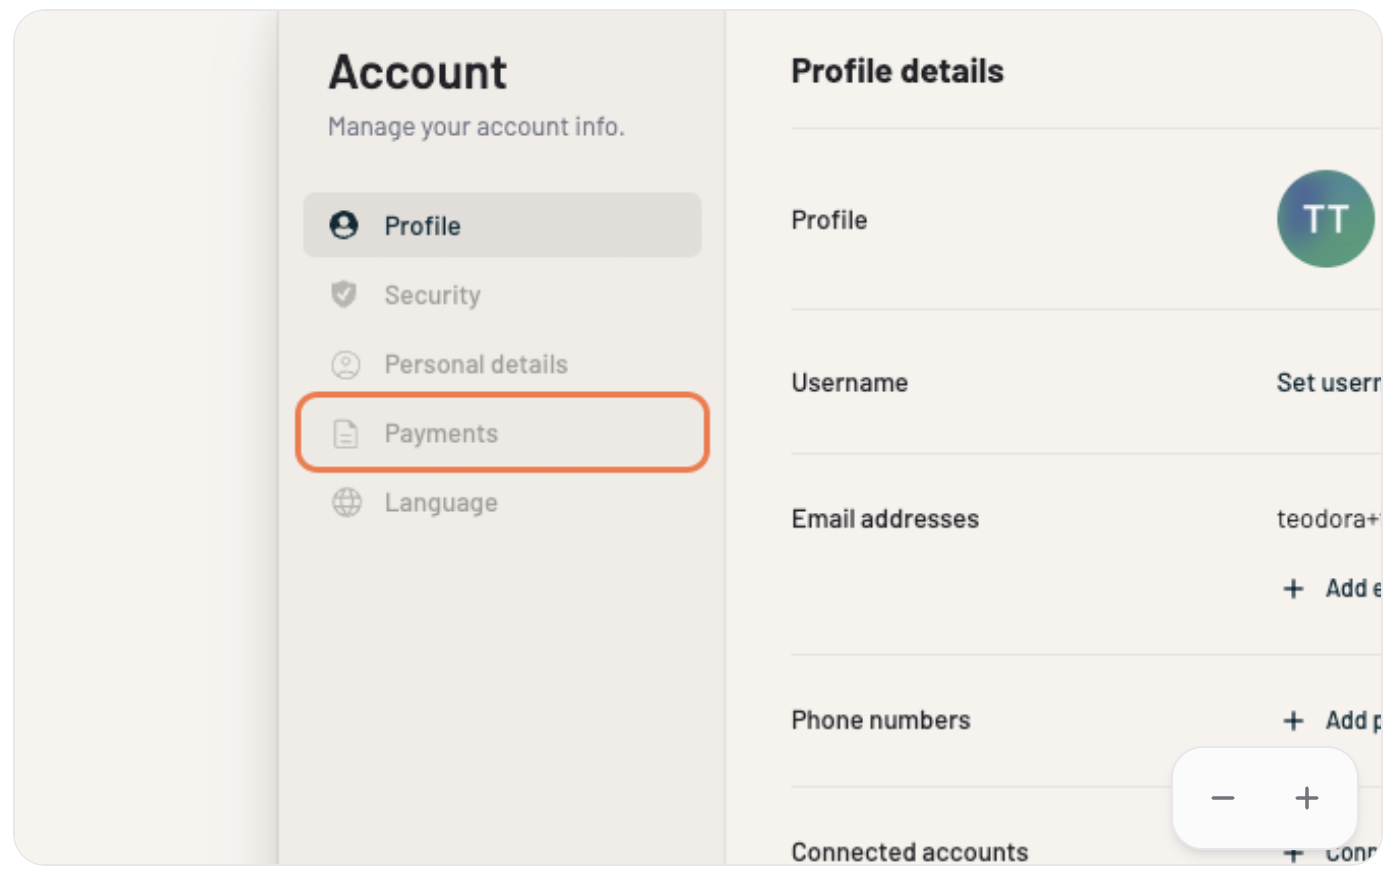
- Go to the Payments Section
- Click on Payments.
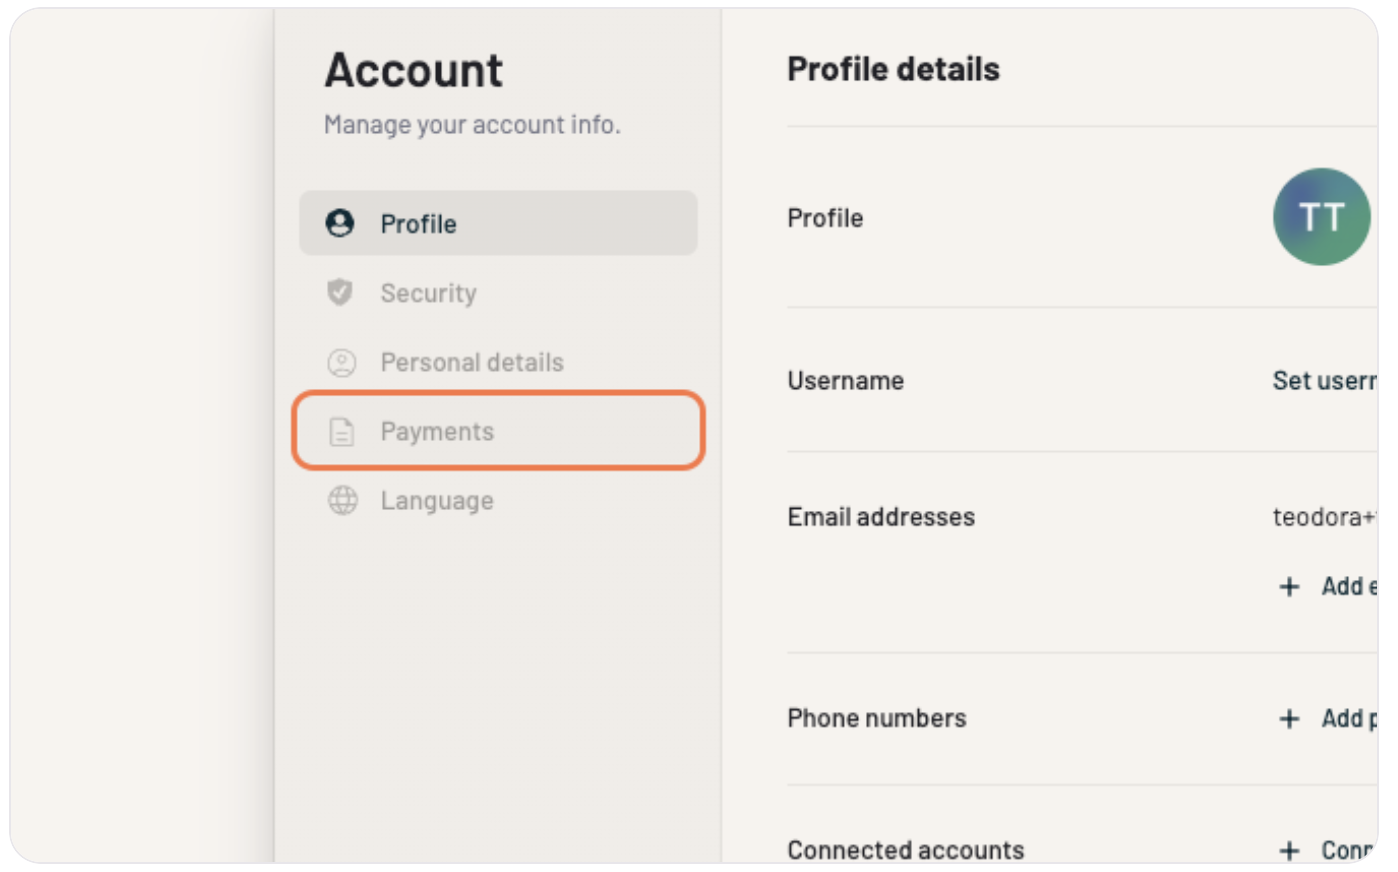
- Click on Complete my Stripe Account.

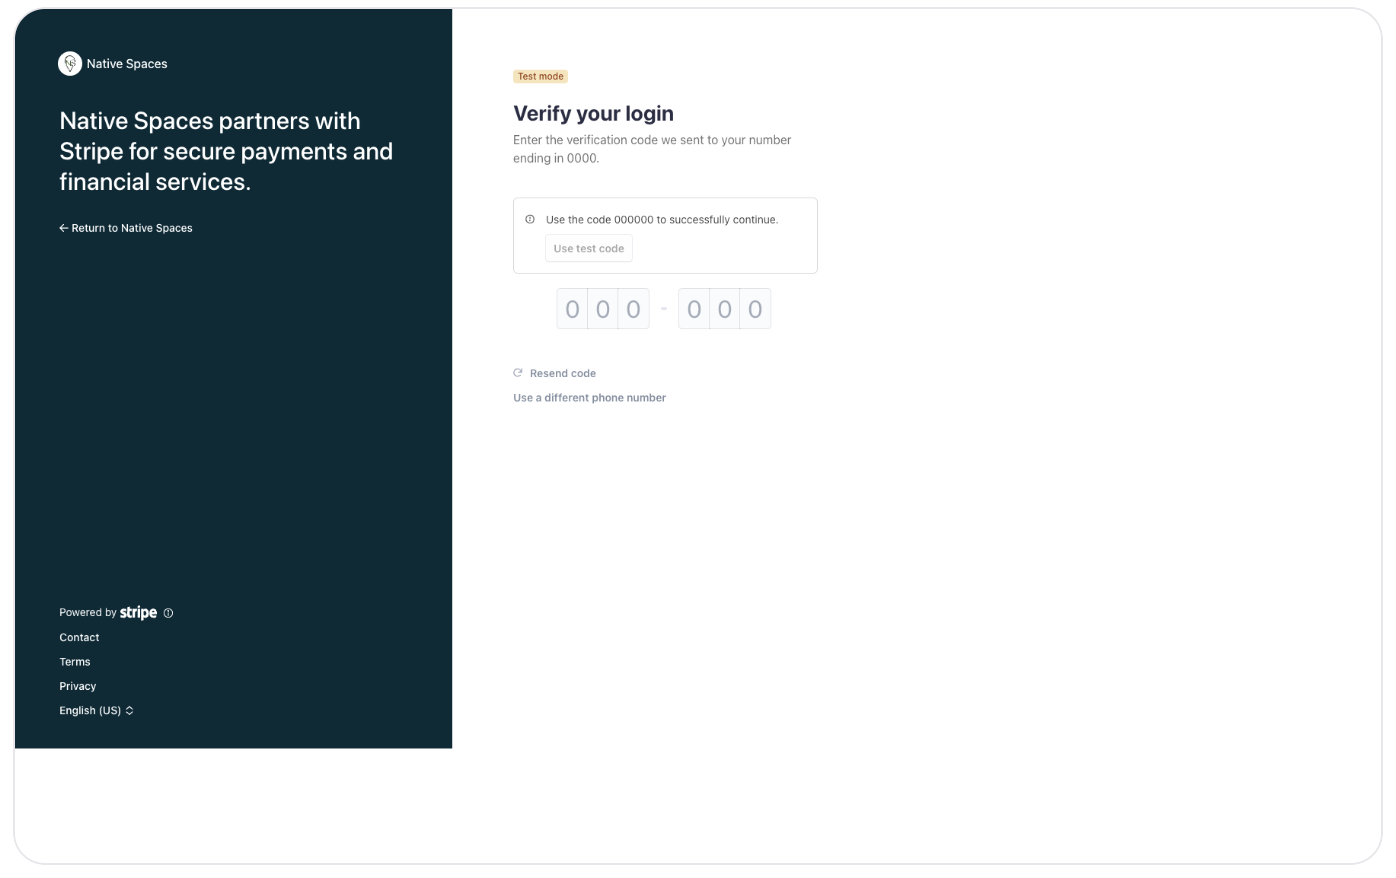
- Phone Number Verification
- Enter your phone number.
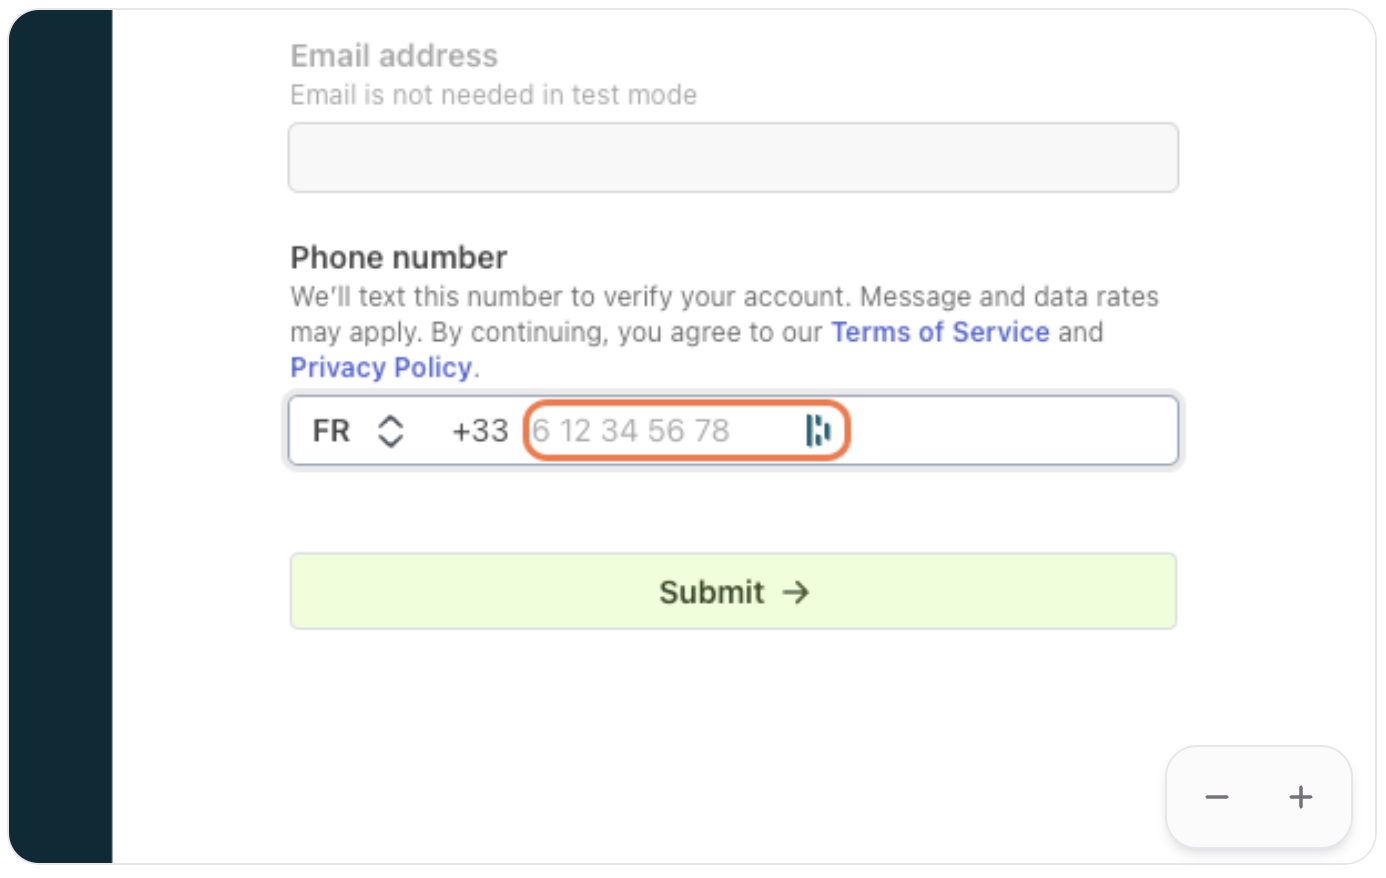
- Enter the verification code received via SMS.
- Company Information
- Specify your business type (freelancer, company, etc.).
- Click on Continue.
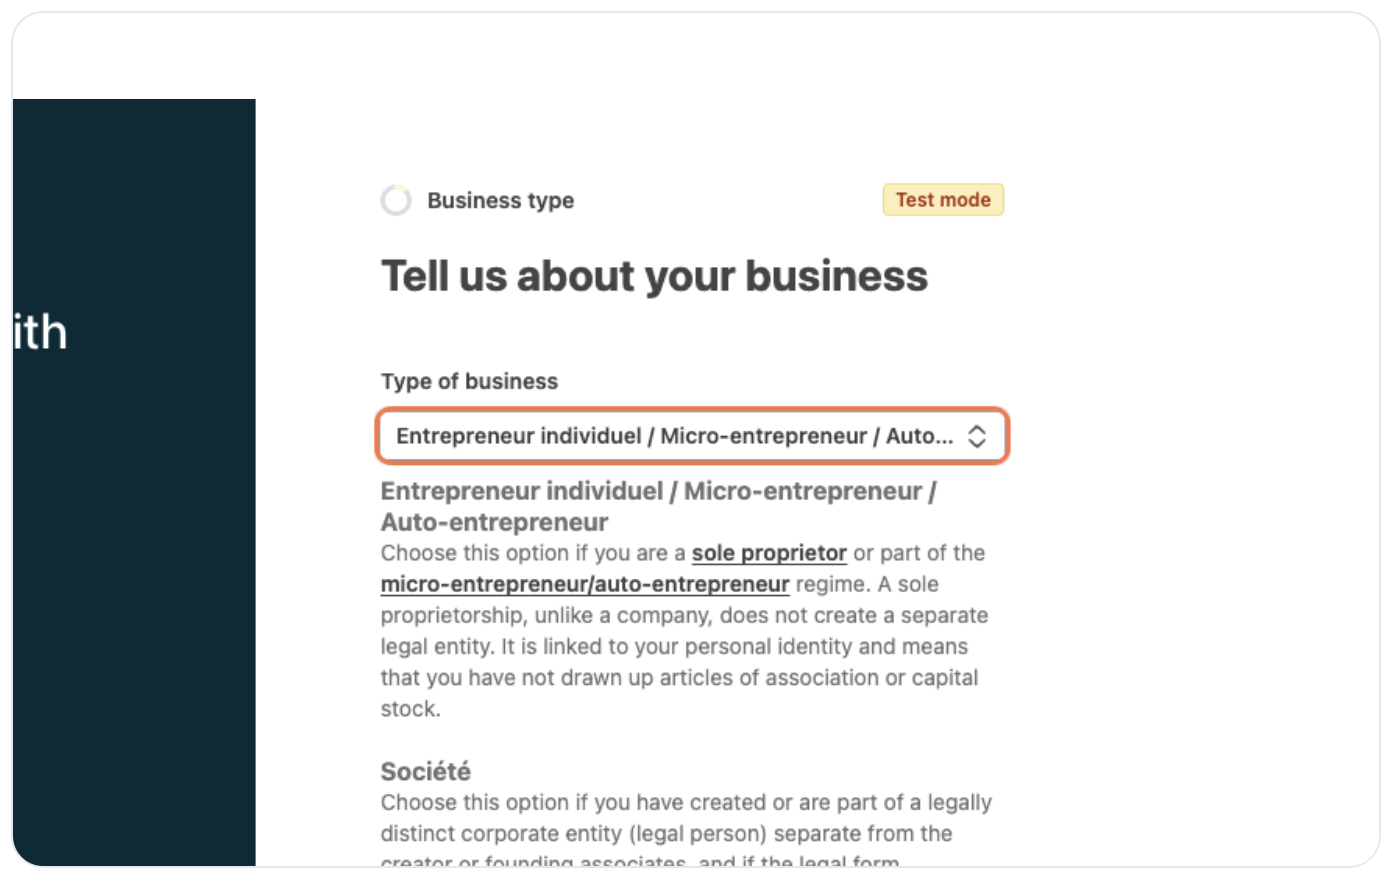
Why does Stripe ask you to select “Sole Proprietor” even if you’re a private individual?
You might be wondering why Stripe asks you to select “Sole Proprietor”, even though you don’t officially run a business. It’s a common question — and the answer is simple.
➡️ Stripe requires a legal status for anyone receiving funds through their system. In Europe, even if you're just a private individual, Stripe does not offer a “private person” option in their form.
Here’s why:
Stripe works as a professional payment infrastructure. It uses a system called Stripe Connect, which allows platforms like Native Spaces to distribute payouts automatically to venue owners.
Even if you’re only renting out your venue occasionally, Stripe needs to verify some basic information for compliance and security reasons.
🧾 What should you do?
Just select “Sole Proprietor” — for Stripe, this also covers individuals who are not officially registered businesses.
There’s no need for extra paperwork: you don’t need a company registration number (like a SIRET in France) if your activity is occasional and Native Spaces has correctly configured Stripe.
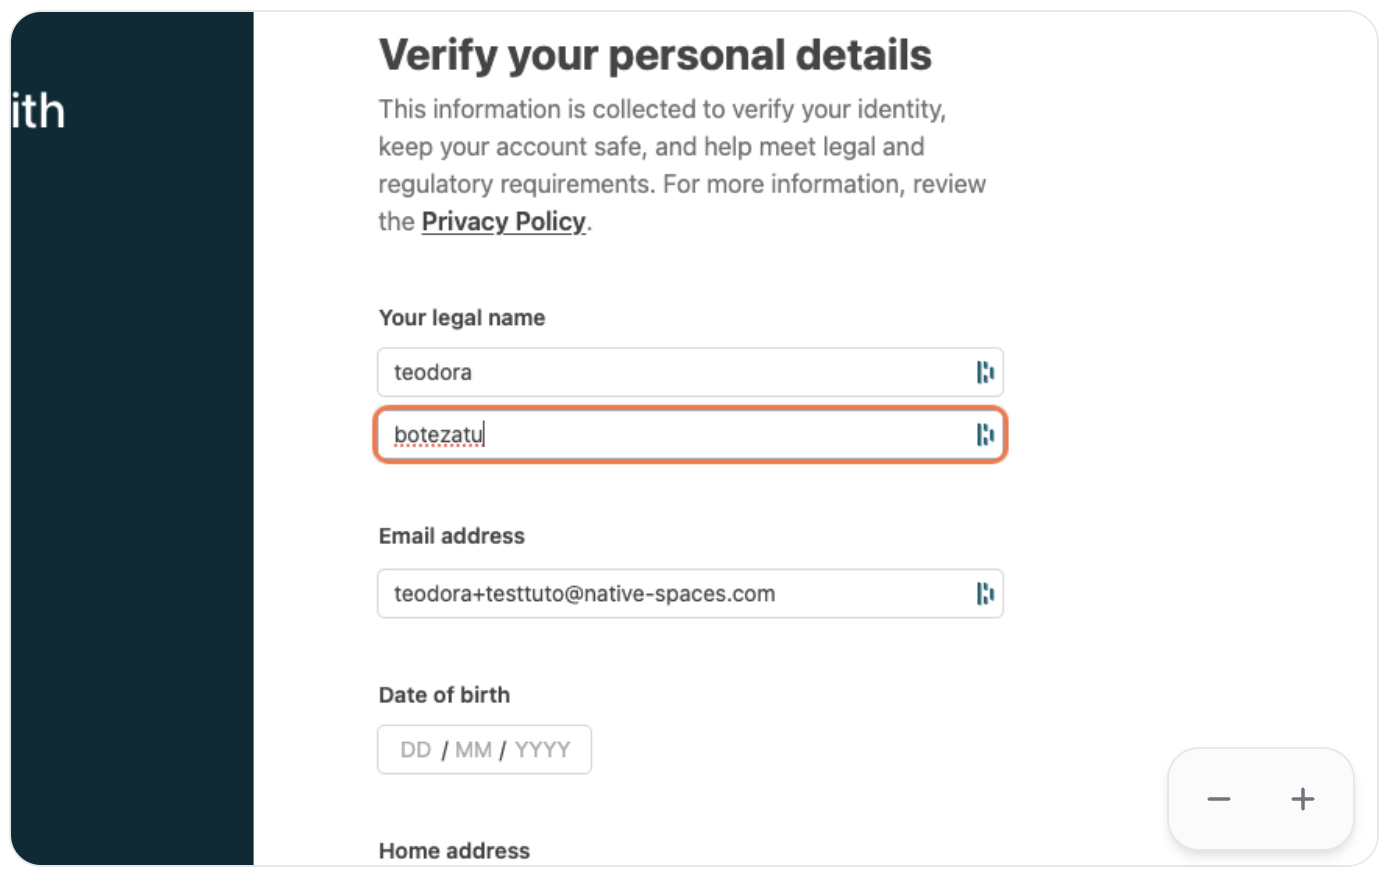
Stripe will ask you for:
- Your full name
- Your bank account details (IBAN or account number)
- Your date of birth
- Occasionally, an ID document for security reasons
✅ This doesn’t mean you’re starting a business — it’s just the legal label Stripe uses to identify anyone receiving payments through their system.
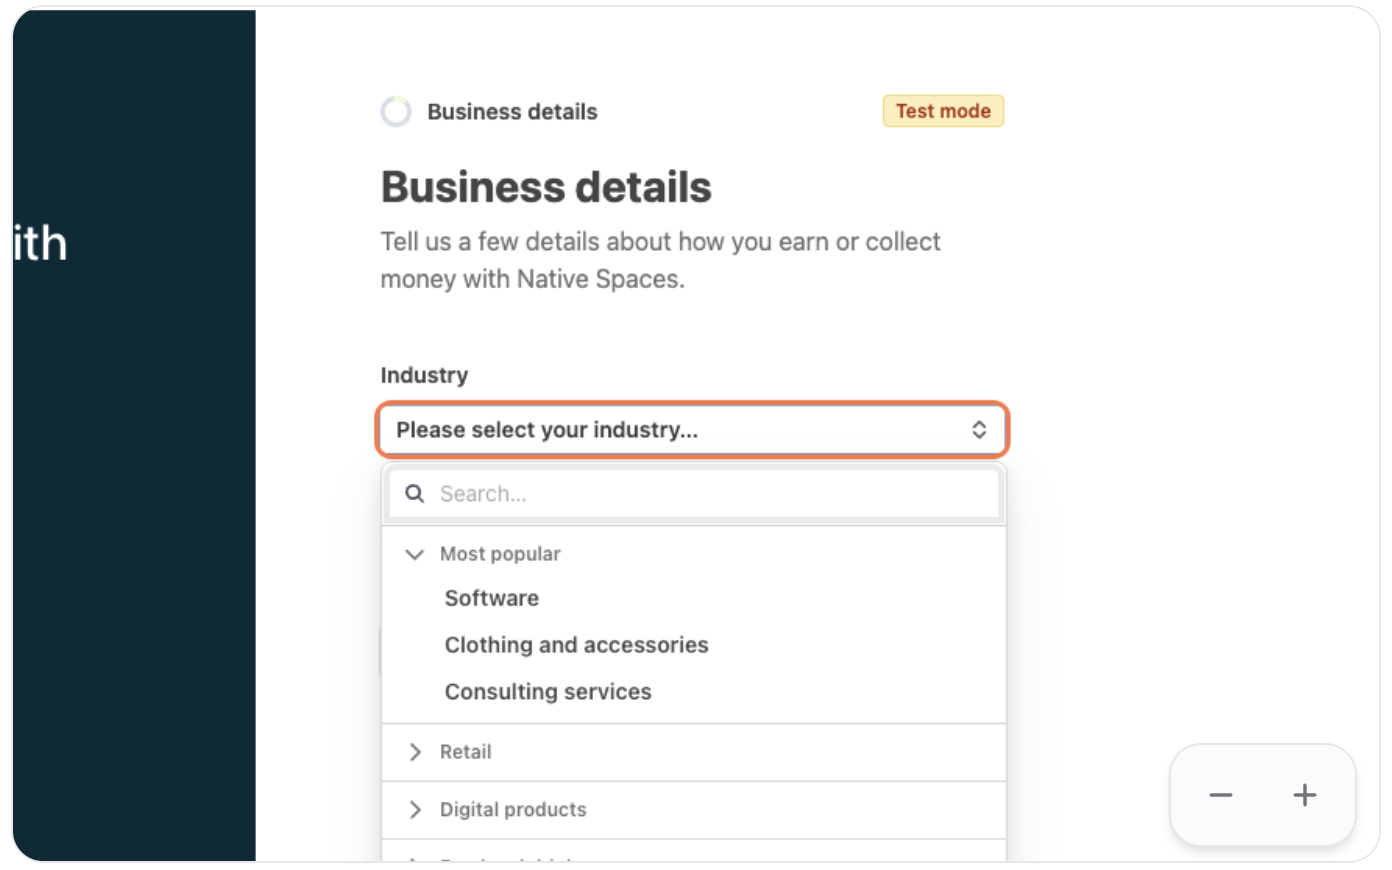
- Business Details
- Add your personal information.
- Select your industry sector.
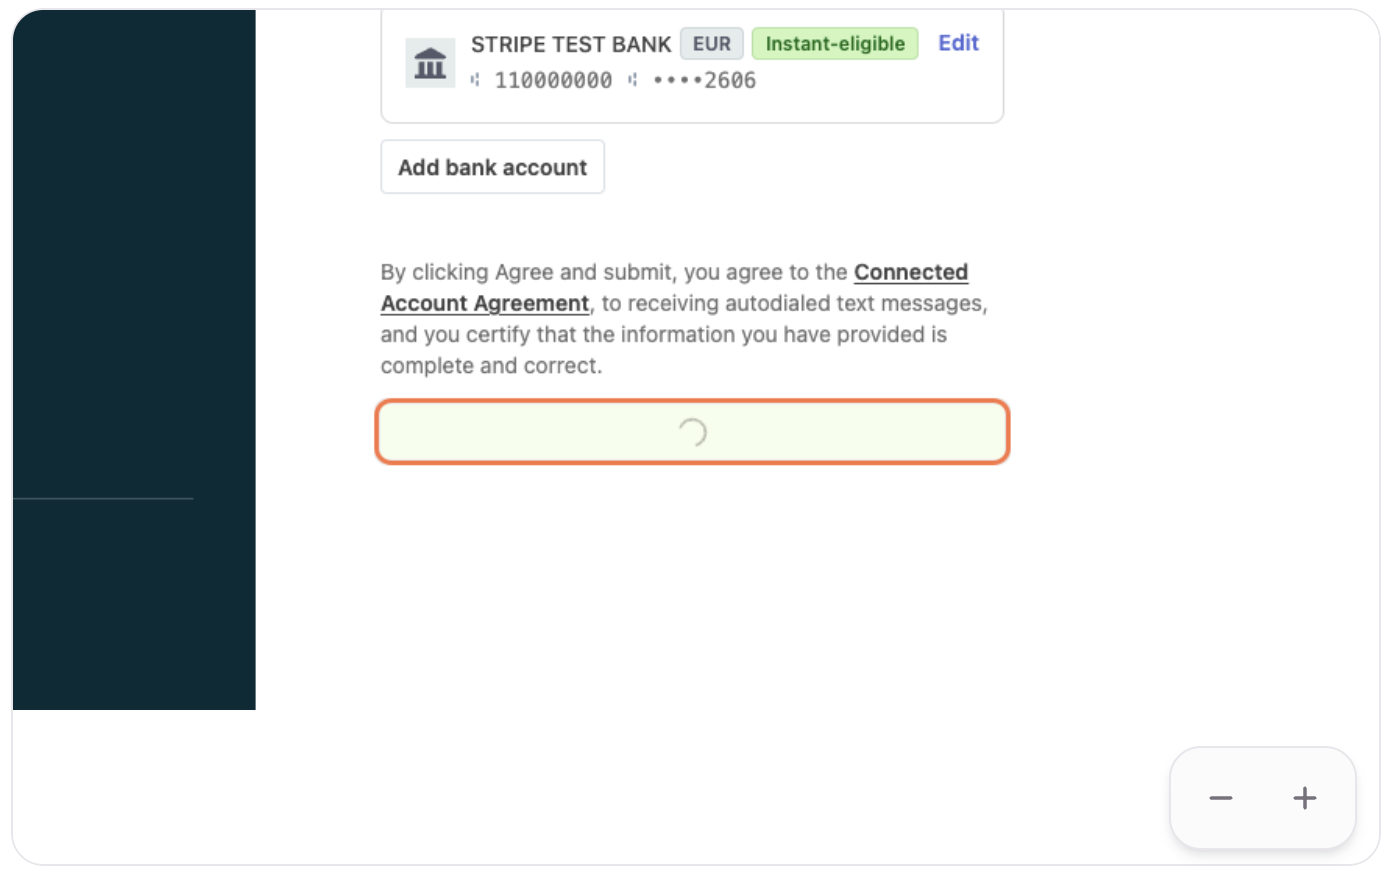
- Add Bank Details
- Enter your IBAN.
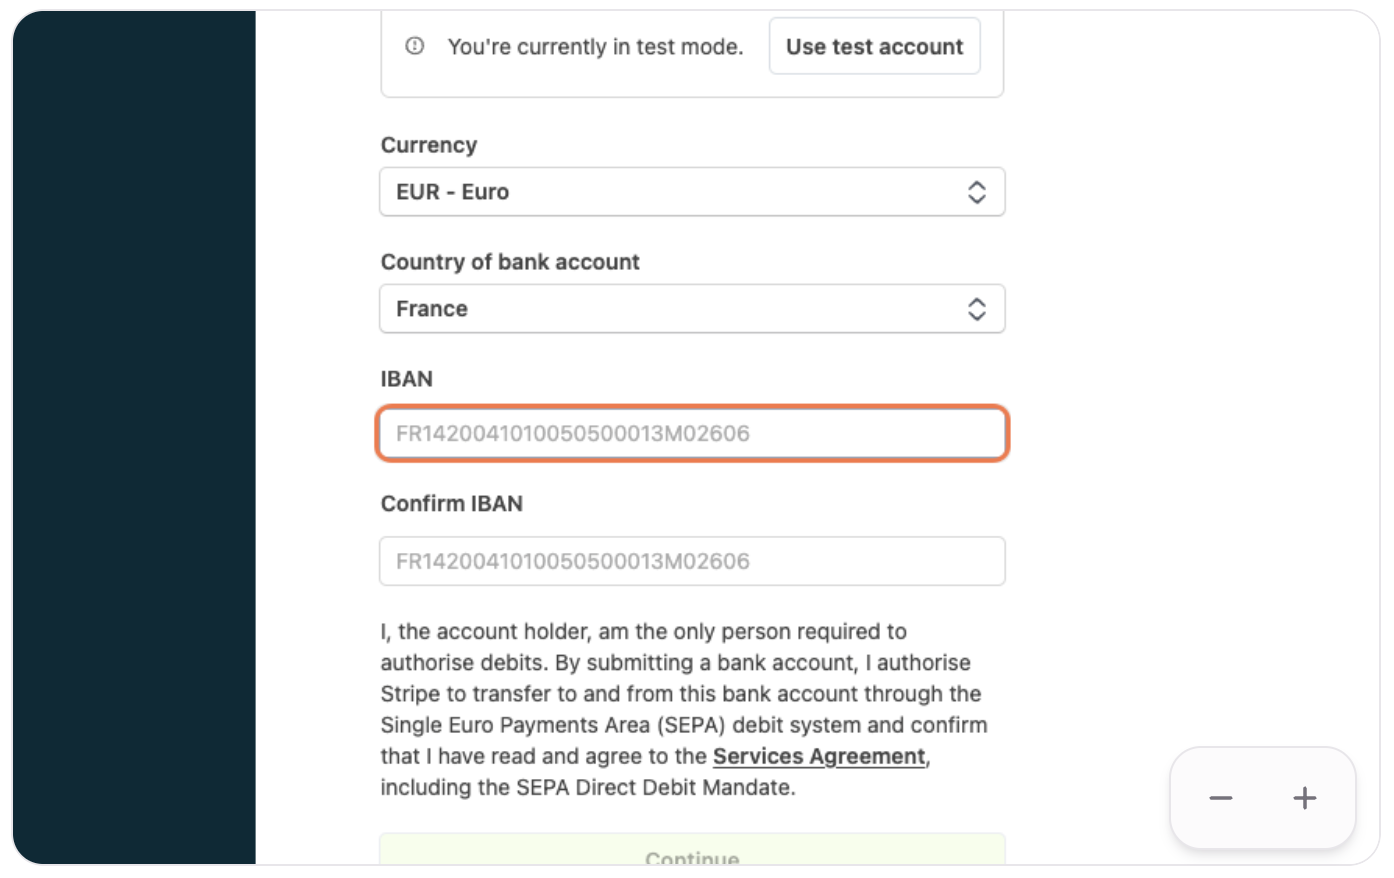
- Click on Accept and Submit to validate your account.
Your Stripe account is now set up!
How to Access Your Stripe Account?
Once your account is activated, you can easily access it to check your balance and track your payments.
- Go to Your Profile
- Click on Profile.
- Go to the Payments tab.
- Open Your Stripe Account
- Click on Open Stripe Account.
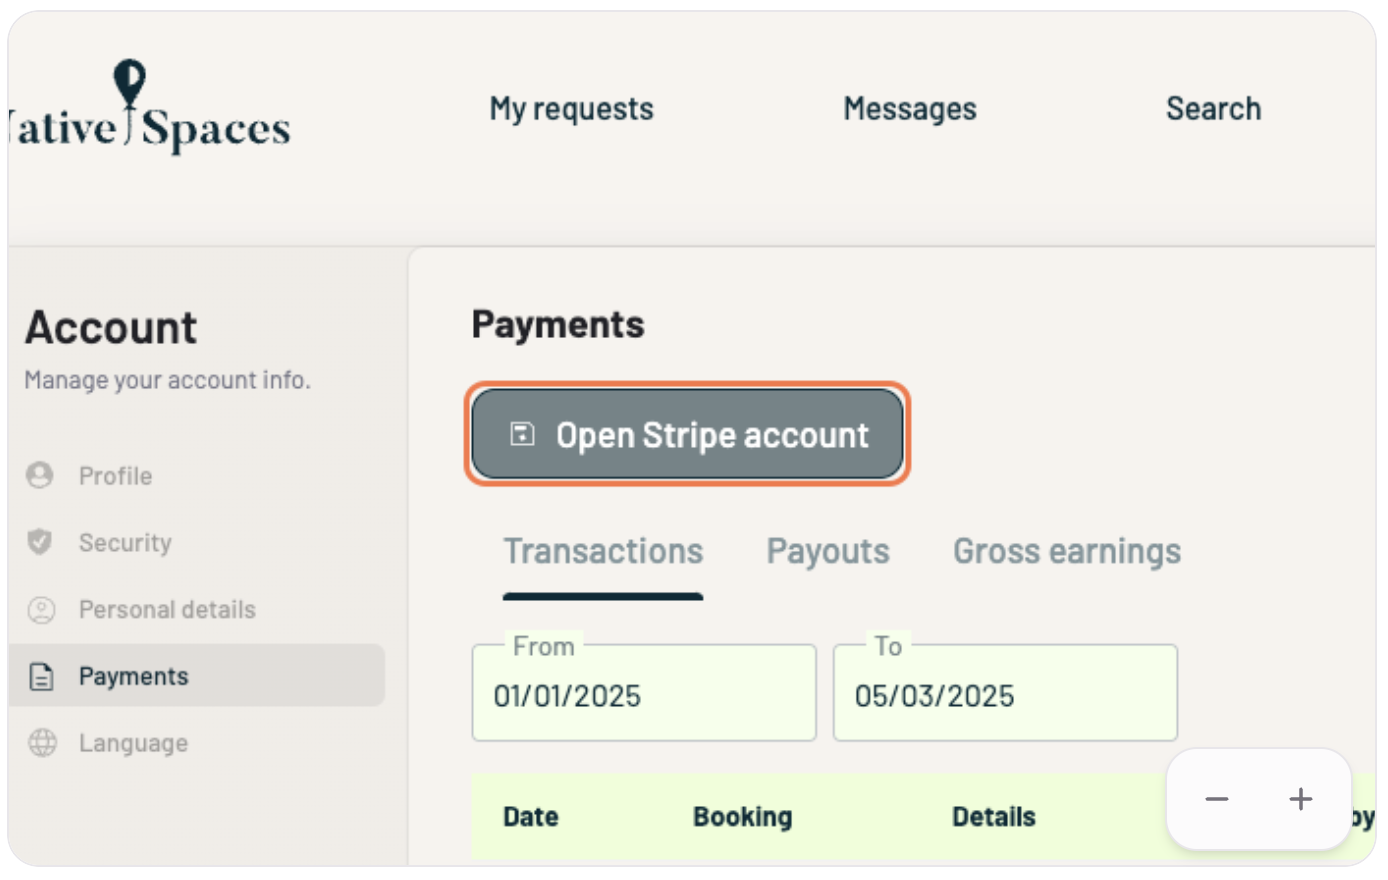
- You’ll be able to see an overview of your balance and transactions.
💡 Tip: Make sure to complete all requested information to avoid payment delays.